Fitting it together precisely
David Wilson is a man with a challenging job. During the assembly of the ITER device, he'll be responsible for ensuring that the alignment of the principal components and ancillary systems—both in relation to one another and to their global position within the Tokamak Building—is carried out precisely. How, exactly, is precisely defined in the context of a machine with components weighing hundreds of tonnes and standing twenty metres tall?
"For many of the machine's largest components, we're looking at assembly tolerances in the order of 1 to 3 millimetres," says David, who is the alignment and metrology lead engineer for ITER. "The size and weight of the components and the fact that we're aligning the components along both a horizontal and a vertical axis makes aligning and assembling the ITER machine very demanding."
Advances in optical metrology techniques (from the Greek metron for measurement) over the last two decades have created sophisticated tools that will play an important role in the success of assembly operations for ITER. From laser trackers that deliver real-time measurements within 0.01mm/m accuracy; to photogrammetry cameras capable of processing thousands of images and recreating the as-built, 3D position of components; and laser scanners that create digital representations of component surfaces ... extensive use of all these metrology instruments will be required to successfully manage ITER assembly.
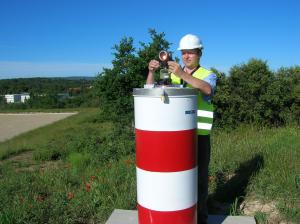
A similar reference, or datum, network will be installed within the machine pit and adjacent galleries once the Tokamak Building is completed. Exploiting the most reliable (i.e., unmovable) surface available—the concrete bioshield—David and his future team will establish a matrix of reference "targets," or fixed points for use in measuring and aligning tokamak components. A survey of the key building characteristics (bioshield, port cells, penetrations ...) will determine the optimum position within the pit from which to commence assembly of the machine.
Dimensional control of the components for ITER begins at suppliers' factories, where measurements will be made during, and on completion of, the manufacturing processes. Metrology engineers will re-inspect the principal components once they arrive at ITER and continue to control them throughout the assembly process. "By recording the as-built geometry of the machine, we will have an actual record of ITER assembly, one that takes into account all of the variations with respect to design," says David. "This will be an invaluable source of data for future modifications or revisions of the machine."
Assembly operations will progress from bottom to top; during the first assembly tasks, the empty machine pit will provide a stable platform for metrology instruments and a clear area for alignment activities. "One of our major challenges, however, will be the progressive congestion inside of the Tokamak Building," stresses David. "Instrument positioning will become more challenging and tailored solutions will need to be provided. We need to ensure that lines of sight remain available throughout the assembly of the principle tokamak components ... even when there is no longer any room to swing a cat!"
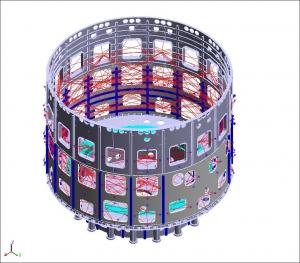
A huge amount of measurement data will be compiled during assembly of the vacuum vessel, as the nine vessel sectors are aligned and welded first as pairs, then as triplets, then into one vessel. These measurements will ensure that the required tolerances are maintained, despite variation from design parameters that may occur as a result of sector manufacture, alignment precision, measurement uncertainty, or weld shrinkage. "We need to develop and qualify our measurement processes today, as ITER components are under construction all over the world," stresses David. Using software tools developed specifically for ITER, a survey simulation of 9,000 points based on CAD data (Computer Aided Design) was carried out to determine achievable accuracy.
At every stage of ITER assembly, as the "as-built" data accumulates, David and his team will adjust alignment criteria. Optimization algorithms will be used to achieve the best possible configuration for machine operation, especially in relation to the as-built magnetic axis of the machine and the alignment of components in relation to this axis.
"Achieving assembly tolerances in ITER will mean pushing the boundaries of survey accuracy while at the same time managing a huge amount of as-built data," says David. "One should never say never, but I think it safe to say that twenty years ago, ITER couldn't have been built to the tolerances that have been requested today."
Thanks to David Wilson for his contribution to this article.
For more information on metrology activities for ITER, visit the ITER website.


