The art and science of calibration
Many of the components that make up the ITER device require sub-millimetre accuracy for assembly—a feat accomplished with specialized metrology equipment that is calibrated at regular intervals.
The ITER Organization metrology team maintains a large selection of metrology instruments which are used by its framework contractors and loaned to assembly contractors when loan agreements are in place. This arrangement makes it easier to coordinate the annual calibration required for each piece of measuring and testing equipment to ensure it remains accurate as it undergoes shock, both small and large, or simply drifts over time. “When we purchase an instrument, the manufacturer supplies a calibration certificate indicating conformance to specification and the date the calibration was performed,” says Kwangju Mun, metrology survey technician. “We schedule the next calibration one year after that date.”
The team uses a platform from a company called Ape Software, which has become something of a standard for use in large projects that need to show regulatory compliance. During the equipment registration process, technicians enter information such as the calibration interval, who performs the calibration, certificate references, the serial number, maintenance contract details, and pictures. The Ape platform uses a database to track the registered instruments and produces reports in a spreadsheet format, with color-coded messages to indicate when calibration is needed. Specialized reports can be generated to demonstrate regulatory compliance. The software also helps manage the status of each piece of equipment—including who is using it and where it is located.
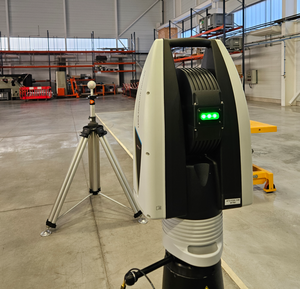
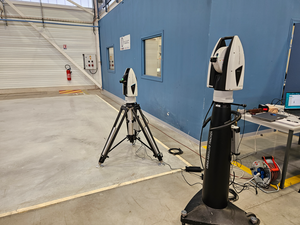
During laser tracker annual calibration by the supplier, components are tested and adjustments made if necessary. The supplier also makes sure the absolute-distance meter scale, which is how accurately an instrument calculates distance, remains within the maximum permissible error for the type of device—a value specified by the manufacturer.
One component that is calibrated is called the absolute distance meter, which the absolute interferometer (AIFM) uses to provide stable, high-speed absolute distance measurements of moving objects. The absolute distance meter uses the information from the interferometer to compensate for the wobbly wave form when the target is moving, and as soon as the average minimum point on the wave is calculated, the absolute distance meter feeds absolute distance measurements to the interferometer, changing it from a relative interferometer to an absolute interferometer.
Other examples of components that need calibration are the embedded meteorology station, which serves as a reference for temperature, pressure, and relative humidity, and the scale bar. "The scale bar is made of invar and it is not very affected by temperature differences, so once it’s calibrated we can use it as a reference during measurements," says Mun.
The metrology team calibrates tools more often than annually. “Our instruments are very sensitive and can be affected by shocks—even small ones,” says Mun. “If we know a piece of equipment has undergone shock, we do additional, unscheduled calibration.”
The team also does field verification checks before and after each series of measurements. "If the errors observed exceed the permissible maximum error of the equipment under the given conditions—such as distance and temperature—it indicates that the equipment needs to undergo a new compensation process,” says Mun.


